NM-Miner lottery
Setting up an NM-Miner and win the Bitcoin lottery!Introduction
I’ve came accross the concept of lottery mining for Bitcoin and wanted to give it a try. The idea behind this concept is to use a low power device running continuously to try to mine and with enough luck, it might end up resolving a block and getting the reward. This is not really a profitable way to mine Bitcoin but more of a fun project to see if it works. And who knows, maybe it could en up paying for itself.
Hardware
For this project, I bought an all in one already assembled ESP32 + LCD capacitive touch screen from NM Miner for around 20$. It consists of an ESP32-DO a yellow LCD touch screen.
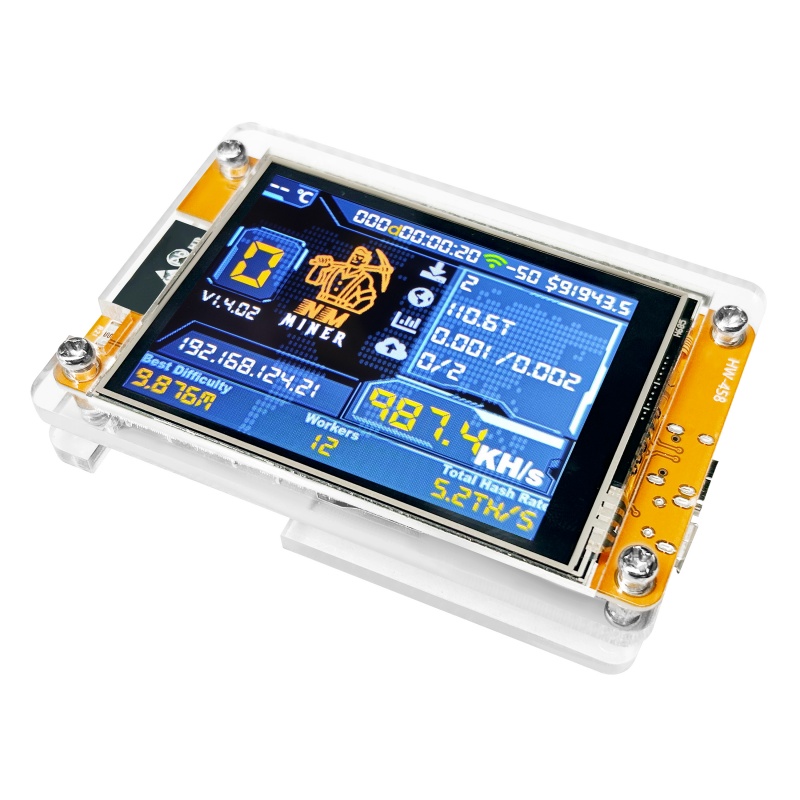
NM-CYD
Setup
Setting this up is quite easy. You plug it on a power source using a USB-C cable and connect to the WiFi access point it creates (use the QR code displayed on scree). Once connected, you can reach the web interface at the ip displayed on screen.
On this web interface you can start configuring stuff like your WiFi credentials, your Bitcoin wallet address (DO IT NOW! On both the primary and secondary pools) and the mining pool you want to use. I’ve left the default pool. Hit save and the Miner shall reboot and start mining automatically.
You can then connect to the webserver again using the new IP address assigned by your router to reach the monitoring dashboard. This dashboard allows monitoring each nodes running on your local network and their stats.
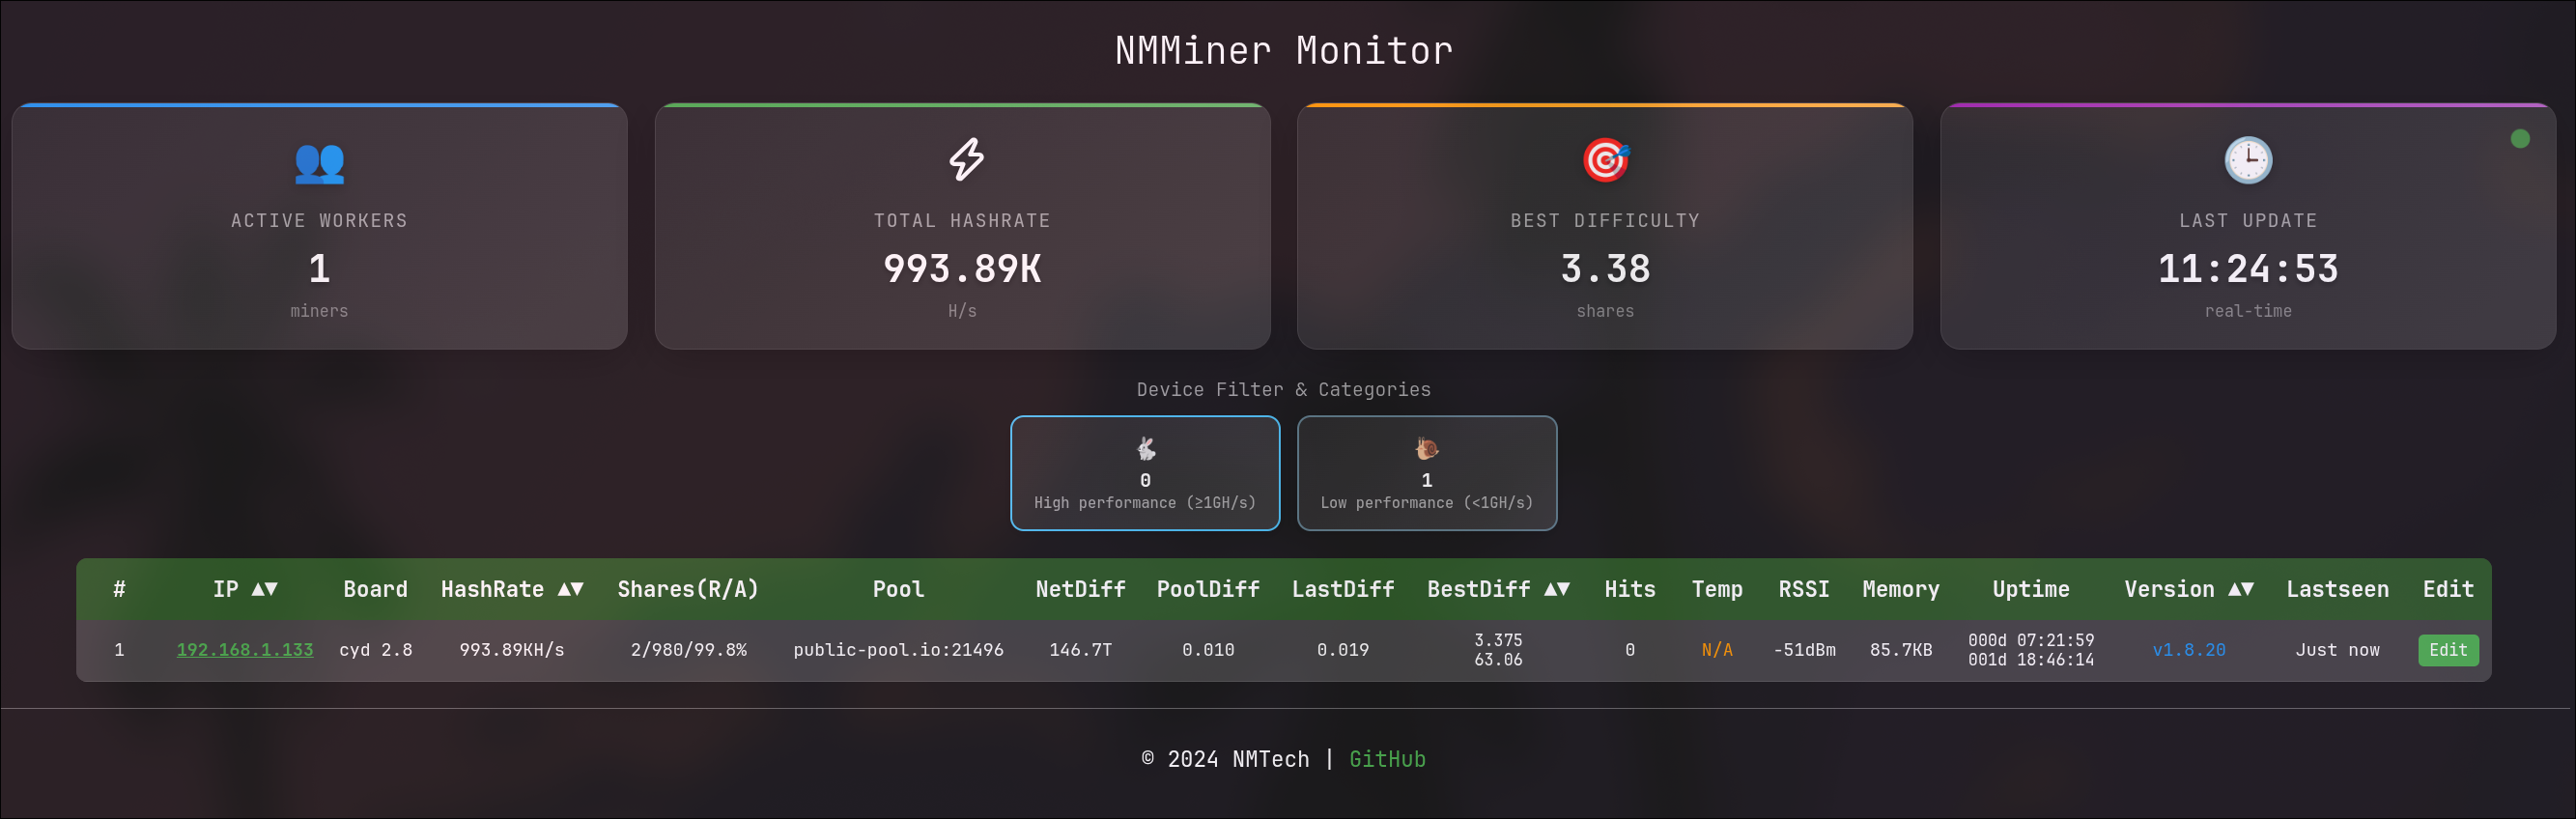
NMMiner Dashboard
Running
Once running, you can see the stats on the LCD screen. It provides usefull information like the current hashrate, number of attempts, accepted shares, rejected shares, and uptime.

NMMiner Details
So now it’s running, One last step is to update the firmware to the latest version. You can see your current version on the LCD screen under the big “0” that should be displayed unless you are so lucky you already mined a block :D
Flashing the firmware is easy enough. You just reach NMminer flashing tool, pick your model and the version you want to flash and hit Connect and Program. It will download the firmware and flash it to your miner. Once done, it will reboot and start mining again.
Then, better safe than sorry, check that your wallet address is still there and re-enter it if needed. (You never know !)
The screen being capacitive touch, you can drag and drop to different screens to see either the dashboard, a ticker for different coins or a clock.
Conclusion
So far, so good. The miner is running fine, connected to the pool and mining away while sipping very little power. I’ll just keep it running on my desk, it makes a great live ticker and a cool clock !
What’s really cool though is that in the end, it’s still an ESP32, so you could totally tinker with the firmware and make it do other stuff like adding a web server, display other information on the screen, add sensors,… plug it to a solar panel and make it half autonomous (you still rely on wifi!), connect it to home assistant,… The board has some extensibilities :
- Extended IO plugs (2x4pins) through connectors
- TF Slot (Micro SD), …
- An RGB LED
- Micro USB port
- USB-C port (DC supply and flashing)
- 2 pin speaker plug
- 1 reset button
- 1 boot button
- 1 clear case
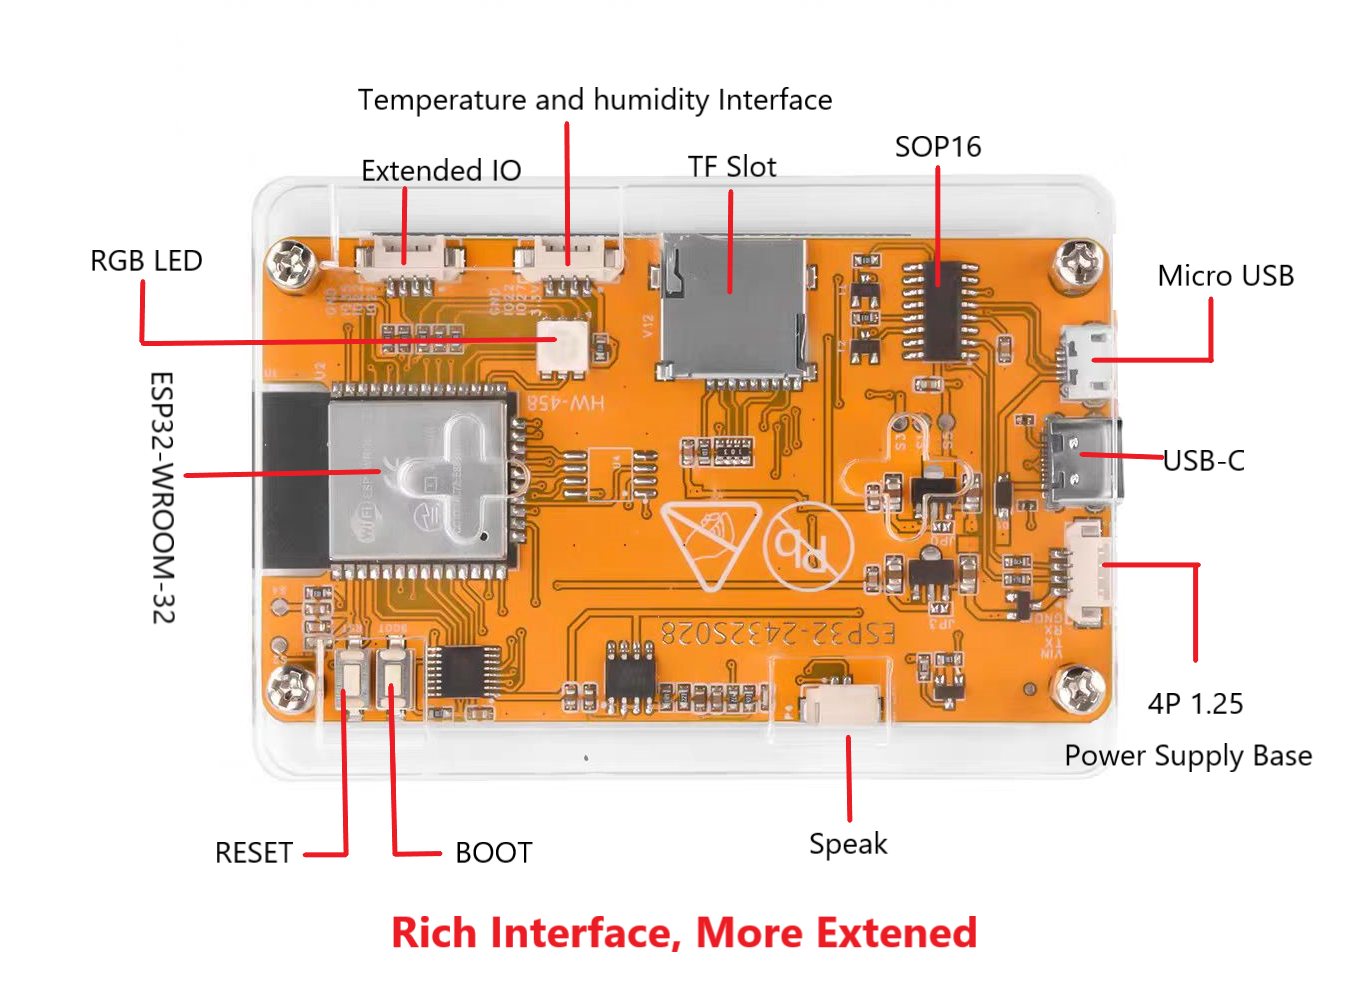
NMMiner Back